This post may contain affiliate links. Please read our disclosure policy.

Table of Contents
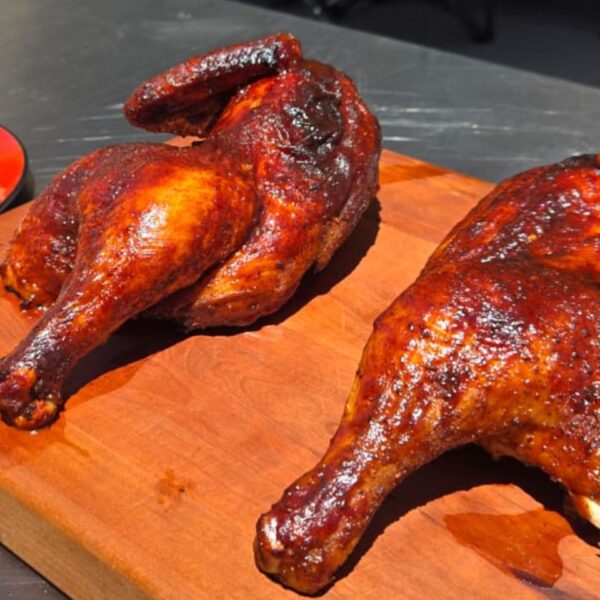
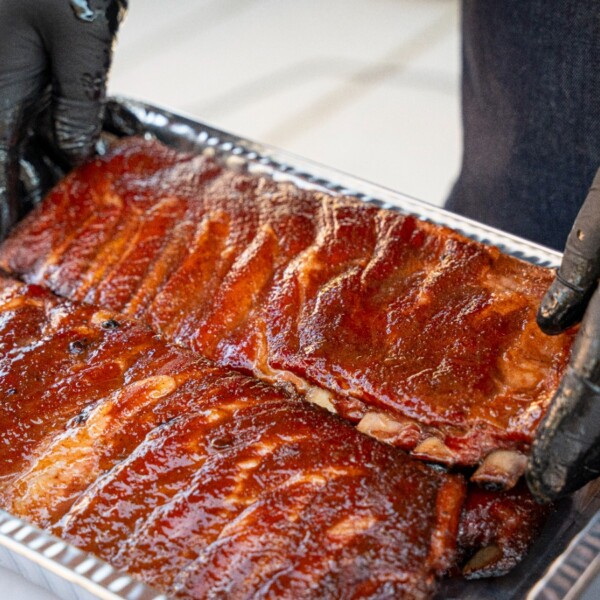
Hey there, BBQ lovers! If you’re here, you must have seen that mouth-watering thumbnail and thought, “Dang, those ribs look good!” Well, you’re in the right place. Today, I’m going to show you how to make some low and slow smoked ribs that will have everyone at your cookout talking for weeks. We’re doing these bad boys on my Rec Tech grill, so get ready for some smoky, tender goodness. Let’s dive right in!
Introduction
Ribs are a BBQ classic, and there’s nothing like the flavor of perfectly smoked, fall-off-the-bone ribs. Whether you’re a seasoned pitmaster or just getting started, this recipe will walk you through the process step-by-step to achieve BBQ bliss. We’re using St. Louis style ribs for this cook, which are already trimmed and ready to go. Let’s get these ribs from the store to your plate with minimal fuss and maximum flavor.
Ingredients
- 3 slabs of St. Louis style ribs (Costco brand recommended)
- Yellow mustard or W sauce (for the binder)
- Your favorite BBQ rub (I’m using my special BBQ rub)
- Dr. Pepper and water (for spritzing)
- Butter (salted)
- Brown sugar (light or dark)
- Optional: Apple juice, apple cider vinegar for additional spritzing
Preparation
1. Cleaning and Trimming the Ribs
First, let’s get those ribs prepped. If you’re using Costco ribs, they come at a great price and are already trimmed. Here’s how I like to get them ready:
- Clean the Ribs: Rinse the ribs under cold water to remove any blood or residue. Pat them dry with paper towels.
- Trim the Ribs: Inspect the ribs and trim off any excess fat or small pieces that might burn or dry out during cooking. I like to make sure the ribs are a nice, uniform rectangle shape for even cooking.
2. Removing the Membrane
This step is crucial for tender ribs. Flip the ribs bone-side up and remove the membrane. Use a knife to lift the edge, then grab it with a paper towel and peel it off.
Seasoning
1. Applying the Binder
A binder helps the rub adhere to the meat. I’m using yellow mustard, but you can use W sauce if you prefer.
- Spread the Binder: Apply a thin layer of mustard on both sides of the ribs. Don’t worry, you won’t taste the mustard once the ribs are cooked.
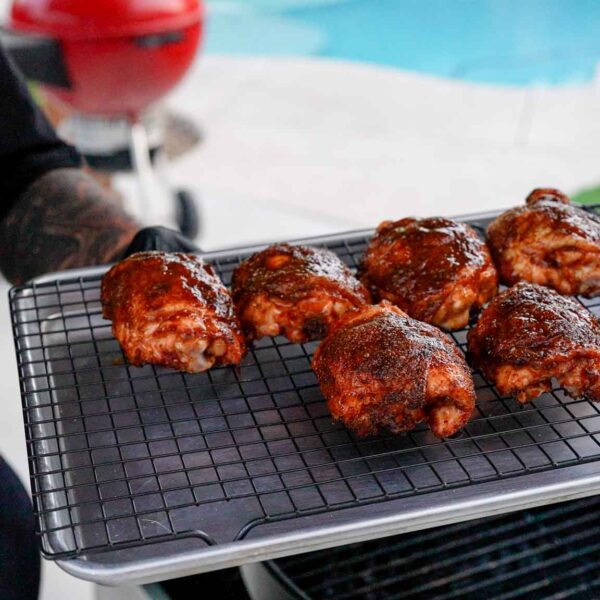
2. Applying the Rub
Now, it’s time to bring out the flavor with our BBQ rub.
- Coat the Ribs: Generously apply the rub on both sides of the ribs. Make sure to get an even coat and pat it down gently to help it stick. This rub is where all the magic happens, giving your ribs that irresistible flavor and beautiful color.
Smoking the Ribs
1. Setting Up the Grill
We’re smoking these ribs on a Rec Tech pellet grill, but you can use any smoker or grill setup for indirect cooking.
- Preheat the Grill: Set your grill to 275°F. If you have more time, you can go even lower at 250°F for a longer, slower cook.
- Arrange the Ribs: Place the ribs on the grill bone-side down. Compress them slightly to keep them in a nice, uniform shape. This ensures even cooking.
2. Spritzing the Ribs
Spritzing helps keep the ribs moist and adds an extra layer of flavor.
- Prepare the Spritz: Fill a spray bottle with Dr. Pepper and a dash of water. You can also use apple juice or apple cider vinegar if you prefer.
- Spritz Every Hour: After the first hour, start spritzing the ribs every 45 minutes to an hour. This keeps them moist and helps form that beautiful bark on the outside.
3. Rotating the Ribs
To ensure even cooking, rotate the ribs about halfway through the cook.
- Rotate and Rearrange: After 2 hours, rotate the ribs. Move the ones on the far end closer to the middle and vice versa. This helps them cook evenly and prevents any from drying out.
Wrapping the Ribs
1. Checking for Color
After about 3 hours, check the color and texture of the ribs. They should have a nice, rich color from the rub.
2. Adding Brown Sugar and Butter
This step is all about tenderness and adding a bit of sweetness.
- Prepare the Foil: Lay out sheets of foil for each rack of ribs.
- Add Butter and Brown Sugar: Place each rack of ribs on the foil and add a few pats of butter and a handful of brown sugar on top. This will melt and create a delicious glaze as the ribs cook.
- Wrap the Ribs: Wrap the ribs tightly in the foil to trap all that goodness inside.
3. Continue Cooking
Return the wrapped ribs to the grill and continue cooking for another 1.5 to 2 hours.
Finishing the Ribs
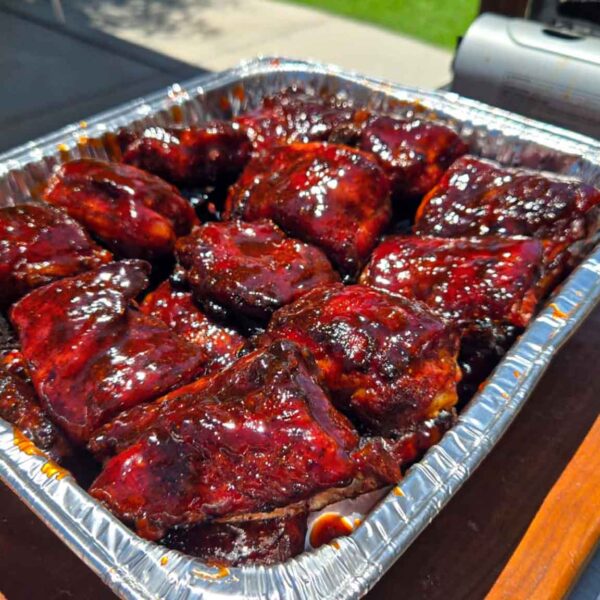
1. Unwrapping and Glazing
After the ribs have cooked in the foil, it’s time to finish them off with a final glaze.
- Unwrap the Ribs: Carefully unwrap the ribs and place them back on the grill.
- Apply the Glaze: Brush your favorite BBQ sauce onto the ribs and let them cook for an additional 30 minutes to set the glaze.
2. Final Spritz
Give the ribs one last spritz to keep them moist and shiny.
Serving
1. Resting the Ribs
Once the ribs are done, let them rest for about 10 minutes. This allows the juices to redistribute, making them even more tender.
2. Slicing and Serving
Use a sharp knife to slice between the bones. Serve the ribs hot with your favorite sides and enjoy the fruits of your labor.
Tips and Tricks
- Uniform Cooking: Keeping the ribs uniform in size ensures even cooking and prevents any parts from drying out.
- Binder Alternatives: You can use other binders like W sauce, pickle juice, or even a mix of mustard and pickle juice for a unique flavor.
- Spritz Alternatives: Apple juice, apple cider vinegar, or even a mix of both work great for spritzing.
- Monitor Temperature: Keep an eye on your grill temperature to ensure consistent cooking. Pellet grills make this easy with their built-in monitors.
Variations
- Sweet and Spicy: Add some cayenne pepper to your rub for a sweet and spicy kick.
- Asian-Inspired: Use a teriyaki glaze instead of BBQ sauce for an Asian twist.
- Honey BBQ: Add honey to your BBQ sauce for a sweet, sticky glaze.
Serving Suggestions
- Serve with classic BBQ sides like coleslaw, baked beans, and cornbread.
- Pair with a cold, refreshing drink like lemonade, iced tea, or a frosty beer.
Storage and Reheating
- Storage: Store any leftover ribs in an airtight container in the fridge for up to 3 days.
- Reheating: Reheat the ribs in the oven at 250°F until warmed through. You can also reheat them on the grill.
Quantity Suggestions for Gatherings
- For a family gathering, plan on 1 rack of ribs for every 2-3 people. This recipe serves about 6-8 people.
Advance Preparation
You can prepare the ribs up to the seasoning step and refrigerate them overnight. This allows the flavors to penetrate the meat even more.
Summarize and Save

The Ultimate Guide to Smoked Ribs: A BBQ Delight You Can’t Miss
Ingredients
- 3 slabs of St. Louis style ribs (Costco brand recommended)
- Yellow mustard or W sauce (for the binder)
- 1/2 cup brown sugar
- Your favorite BBQ rub (I’m using my special BBQ rub)
- Dr. Pepper (for spritzing)
- Butter (salted)
- Brown sugar (light or dark)
- Optional: Apple juice, apple cider vinegar for additional spritzing
Instructions
- First, let’s get those ribs prepped. If you’re using Costco ribs, they come at a great price and are already trimmed. Here’s how I like to get them ready:Clean the Ribs: Rinse the ribs under cold water to remove any blood or residue. Pat them dry with paper towels.Trim the Ribs: Inspect the ribs and trim off any excess fat or small pieces that might burn or dry out during cooking. I like to make sure the ribs are a nice, uniform rectangle shape for even cooking.
- This step is crucial for tender ribs. Flip the ribs bone-side up and remove the membrane. Use a knife to lift the edge, then grab it with a paper towel and peel it off.
- A binder helps the rub adhere to the meat. I’m using yellow mustard, but you can use W sauce if you prefer.Spread the Binder: Apply a thin layer of mustard on both sides of the ribs. Don’t worry, you won’t taste the mustard once the ribs are cooked.
- Now, it’s time to bring out the flavor with our BBQ rub.Coat the Ribs: Generously apply the rub on both sides of the ribs. Make sure to get an even coat and pat it down gently to help it stick. This rub is where all the magic happens, giving your ribs that irresistible flavor and beautiful color.
- We’re smoking these ribs on a Rec Tech pellet grill, but you can use any smoker or grill setup for indirect cooking.Preheat the Grill: Set your grill to 275°F. If you have more time, you can go even lower at 250°F for a longer, slower cook.Arrange the Ribs: Place the ribs on the grill bone-side down. Compress them slightly to keep them in a nice, uniform shape. This ensures even cooking.
- Spritzing helps keep the ribs moist and adds an extra layer of flavor.Prepare the Spritz: Fill a spray bottle with Dr. Pepper and a dash of water. You can also use apple juice or apple cider vinegar if you prefer.Spritz Every Hour: After the first hour, start spritzing the ribs every 45 minutes to an hour. This keeps them moist and helps form that beautiful bark on the outside.
- To ensure even cooking, rotate the ribs about halfway through the cook.Rotate and Rearrange: After 2 hours, rotate the ribs. Move the ones on the far end closer to the middle and vice versa. This helps them cook evenly and prevents any from drying out.
- Prepare the Foil: Lay out sheets of foil for each rack of ribs.Add Butter and Brown Sugar: Place each rack of ribs on the foil and add a few pats of butter and a handful of brown sugar on top. This will melt and create a delicious glaze as the ribs cook.Wrap the Ribs: Wrap the ribs tightly in the foil to trap all that goodness inside.
- Return the wrapped ribs to the grill and continue cooking for another 1.5 to 2 hours.
- Unwrap the Ribs: Carefully unwrap the ribs and place them back on the grill.Apply the Glaze: Brush your favorite BBQ sauce onto the ribs and let them cook for an additional 30 minutes to set the glaze.
- Give the ribs one last spritz to keep them moist and shiny.
- Once the ribs are done, let them rest for about 10 minutes. This allows the juices to redistribute, making them even more tender.
- Use a sharp knife to slice between the bones. Serve the ribs hot with your favorite sides and enjoy the fruits of your labor.
Nutrition
Nutrition information is automatically calculated, so should only be used as an approximation.
Like This? Leave a comment below!