This post may contain affiliate links. Please read our disclosure policy.
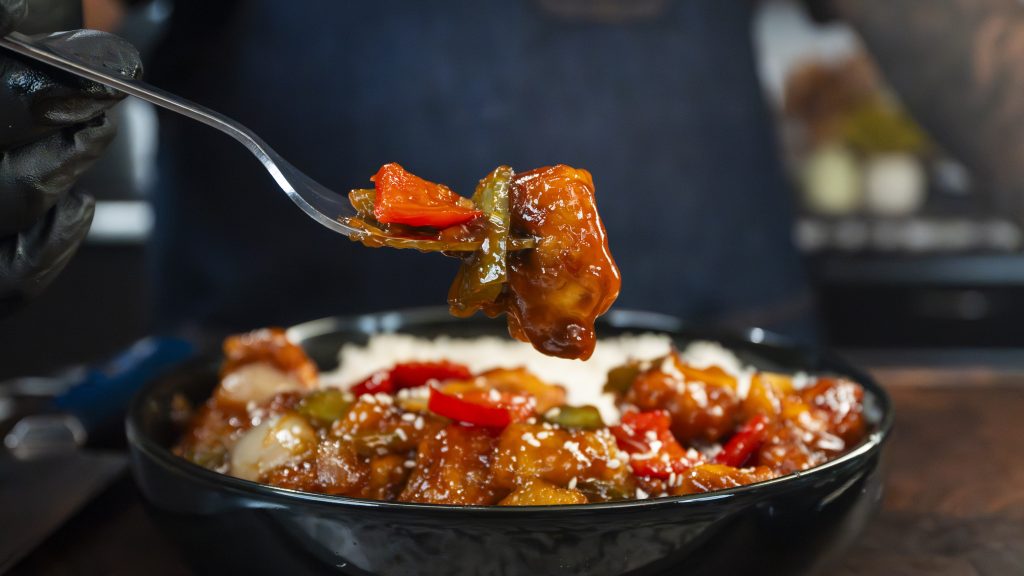
Table of Contents
- Why You Should Make This Sweet and Sour Chicken
- Ingredients
- Step-by-Step Guide to Making Sweet and Sour Chicken
- Expert Tips and Tricks
- 15 Variations of Sweet and Sour Chicken
- What to Serve with Sweet and Sour Chicken (15 Options)
- Storage and Reheating Tips
- How Much Sweet and Sour Chicken Should I Make for Family Gatherings?
- How Far in Advance Can I Make Sweet and Sour Chicken?
Ain’t nothing like that first bite of crispy, golden chicken coated in a sweet and tangy glaze, bursting with flavor in every bite. Sweet and Sour Chicken is one of those dishes that hits all the right notes—crunchy, juicy, sweet, and just the right amount of tang. Whether you’re making it for a weeknight dinner, a special gathering, or just because you’re craving some serious flavor, this homemade version will have you questioning why you ever ordered takeout. Best part? It’s easier than you think, and once you get that first taste, it’s gonna be hard not to go back for seconds.
Why You Should Make This Sweet and Sour Chicken
Now, I know you could pick up the phone and call in an order from your favorite Chinese spot, but let’s be real—homemade always hits different. When you make Sweet and Sour Chicken at home, you control the ingredients, the freshness, and the flavor. No mystery meat, no overly thick, gelatinous sauce—just perfectly crisp chicken and a sauce that’s got the right balance of sweetness and tang.
Here’s why you need this in your recipe rotation:
- Crispy Perfection – That double-coating method ensures every bite is golden and crunchy.
- Fresh, Quality Ingredients – No additives, just good, clean flavor.
- Customizable – You can tweak the flavors, switch up the protein, or even make it spicy.
- Better Than Takeout – Once you taste this, those takeout cravings are gonna hit differently.
- Crowd-Pleaser – This dish is perfect for family dinners, parties, and meal prep.
So go on and get your ingredients together—we’re about to turn your kitchen into your new favorite Chinese restaurant.
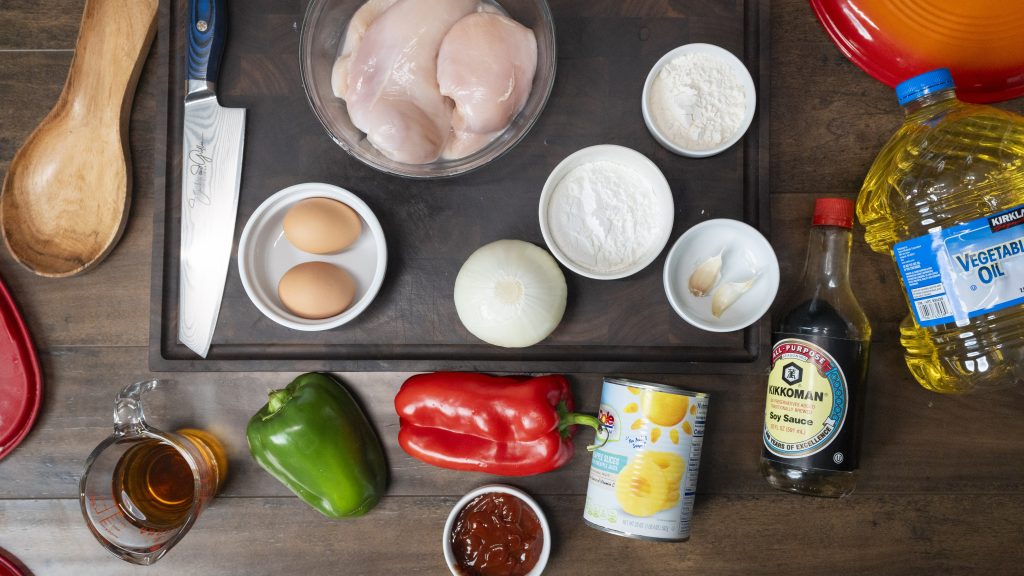
Ingredients
For the Chicken:
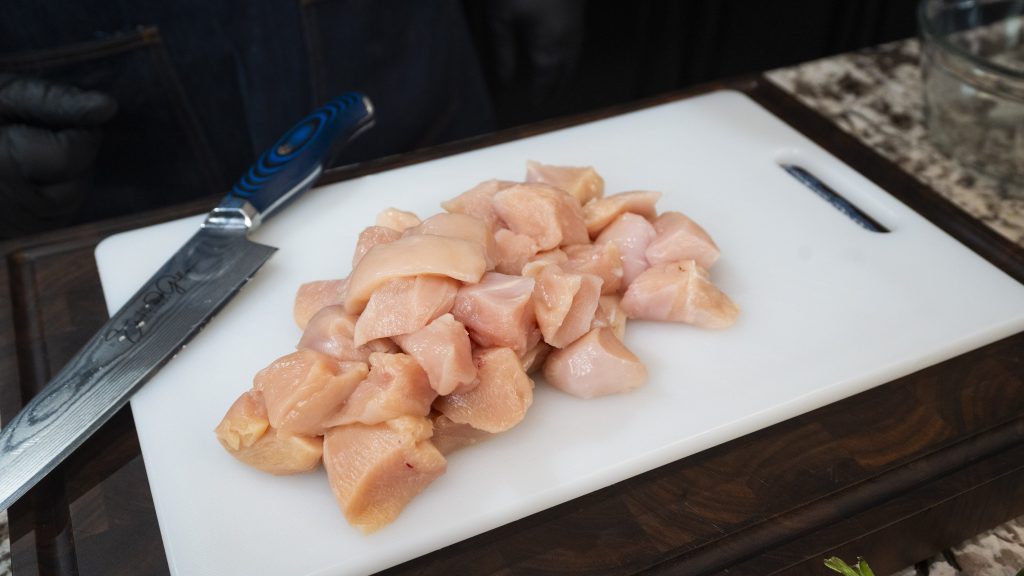
- 1 ½ pounds boneless, skinless chicken breasts, cut into 1-inch chunks
- ½ cup cornstarch
- ¼ cup all-purpose flour
- 2 eggs, beaten
- Canola oil (for frying)
For the Vegetables & Pineapple:
- 1 red bell pepper, cut into 1-inch pieces
- 1 green bell pepper, cut into 1-inch pieces
- ½ yellow onion, cut into 1-inch pieces
- 1 cup pineapple chunks
For the Sweet and Sour Sauce:
- ½ cup granulated sugar
- ¼ cup brown sugar
- ½ cup apple cider vinegar
- ⅓ cup ketchup
- 4 teaspoons reduced-sodium soy sauce
- 2 cloves garlic, minced
Step-by-Step Guide to Making Sweet and Sour Chicken
Step 1: Prepare the Sauce
Start by mixing up that sauce. In a small bowl, whisk together the granulated sugar, brown sugar, apple cider vinegar, ketchup, soy sauce, and minced garlic. Set that aside—this sauce is about to bring everything together later.
Step 2: Heat the Oil
Pour enough canola oil into a deep frying pan or Dutch oven so it’s about 1 to 1 ½ inches deep. Heat it over medium-high heat until it reaches 350°F (175°C). This ensures the chicken gets that crispy, golden texture we’re after.
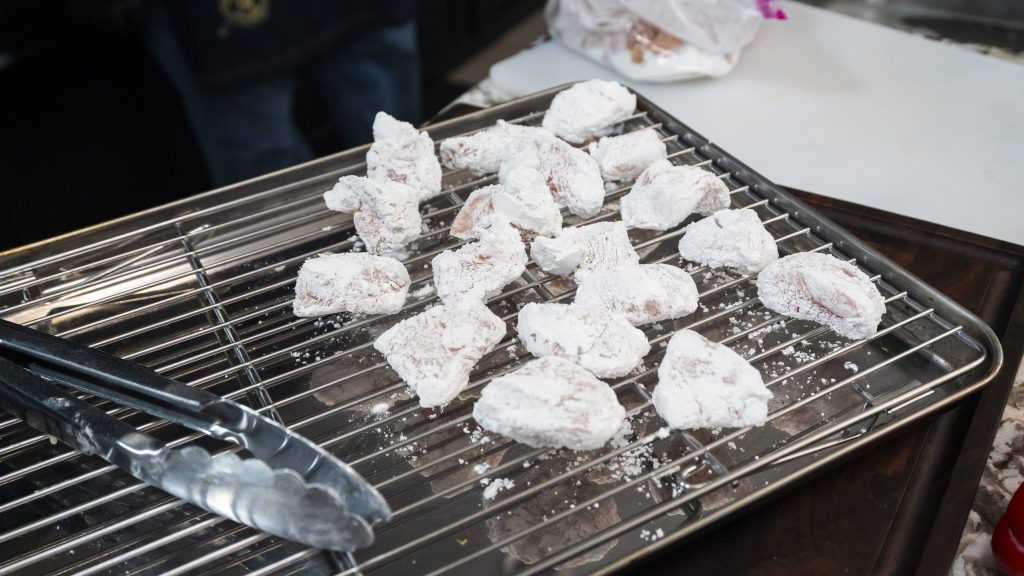
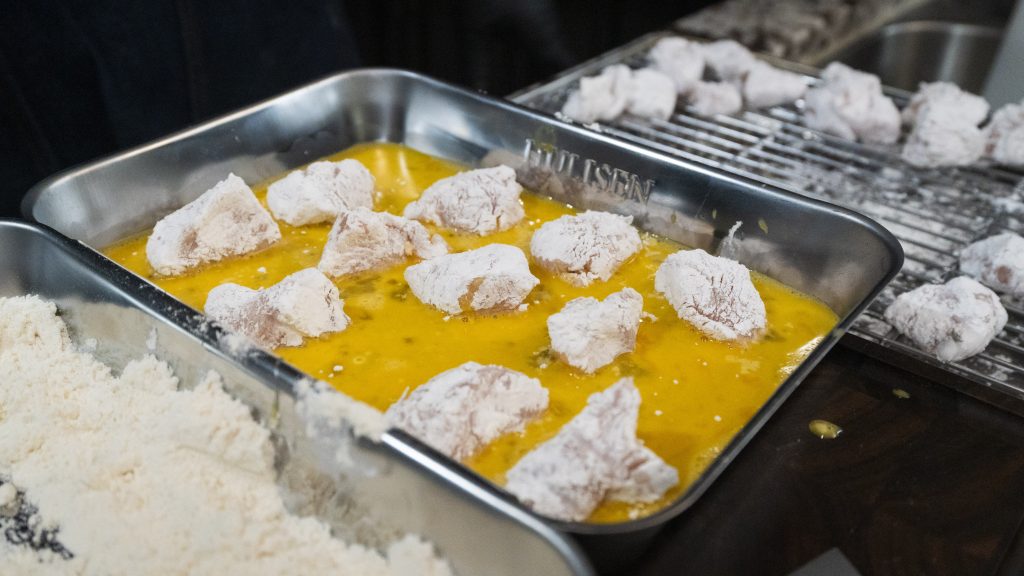
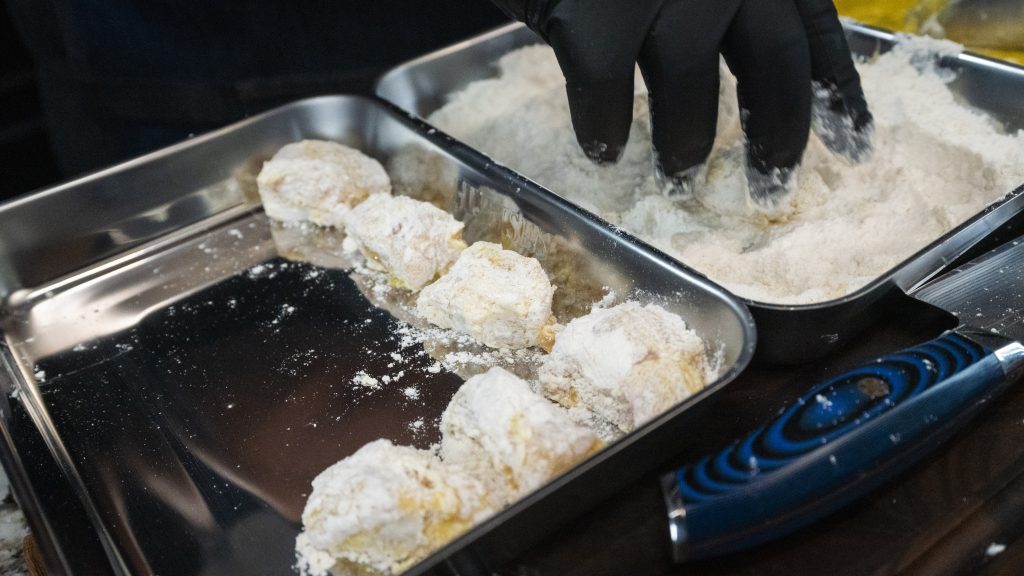
Step 3: Coat the Chicken
- Place the cornstarch into a large ziplock bag, add the chicken chunks, seal, and shake well until fully coated.
- Dip each piece into the beaten eggs, then coat it in flour, making sure each bite is evenly covered.
Step 4: Fry the Chicken
- Carefully add the coated chicken to the hot oil in small batches.
- Fry for 2-3 minutes per batch, or until golden brown and crispy.
- Transfer the chicken to a wire rack or baking sheet (skip the paper towels—this keeps it crispy).
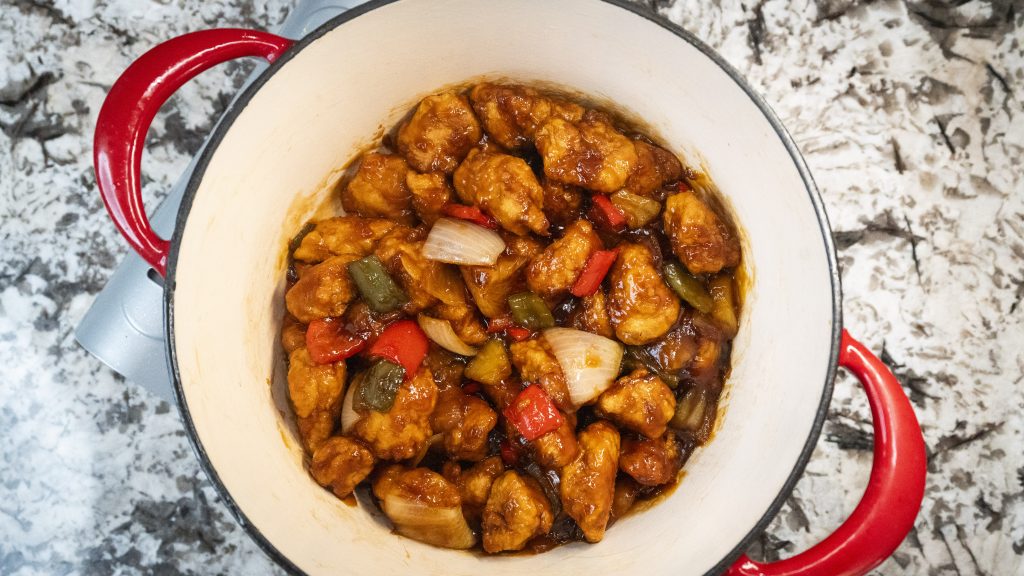
Step 5: Sauté the Vegetables & Pineapple
- Drain off excess oil, leaving about a tablespoon behind.
- Toss in the red bell pepper, green bell pepper, onion, and pineapple chunks.
- Sauté for 1-2 minutes until they’re crisp-tender.
Step 6: Bring it All Together
- Pour in the sweet and sour sauce and stir to coat the veggies and pineapple.
- Cook for 30 seconds to let the garlic infuse the sauce.
- Add the fried chicken back to the pan, tossing everything together until the sauce thickens and coats each bite.
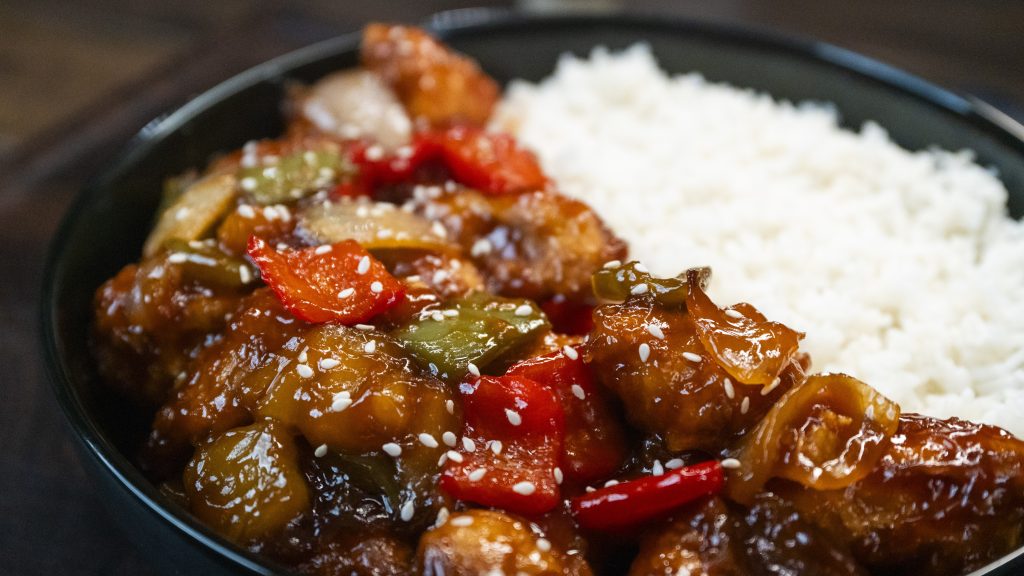
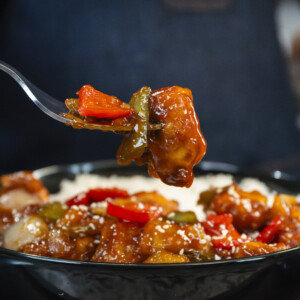
Step 7: Serve and Enjoy!
- Serve immediately over rice or noodles.
- Garnish with sesame seeds or chopped green onions for that final touch.
Expert Tips and Tricks
- Double Coat for Extra Crispiness – That cornstarch and flour combo gives the chicken its signature crunch.
- Use Fresh Pineapple – It adds natural sweetness and a juicy texture.
- Don’t Overcrowd the Pan – Fry in batches to keep that crispy coating.
- Keep the Oil Hot – If it drops below 350°F, your chicken will turn out soggy.
- Want it Spicier? Add some red pepper flakes or a drizzle of Sriracha.
15 Variations of Sweet and Sour Chicken
- Spicy Sweet and Sour Chicken – Add chili flakes or sriracha.
- Honey Garlic Version – Swap out sugar for honey and add more garlic.
- Pineapple-Free – Skip the pineapple for a tangier dish.
- Gluten-Free – Use cornstarch instead of flour and tamari instead of soy sauce.
- Keto-Friendly – Use almond flour instead of cornstarch and a sugar-free sweetener.
- Orange Sweet and Sour – Replace vinegar with orange juice.
- Mango Twist – Use mango chunks instead of pineapple.
- Teriyaki Fusion – Mix in some teriyaki sauce for added depth.
- Lemon Sweet and Sour – Swap apple cider vinegar for lemon juice.
- Baked Version – Skip frying and bake the coated chicken.
- Air Fryer Method – Use an air fryer at 375°F for about 12-15 minutes.
- Vegetarian Version – Use tofu instead of chicken.
- Beef Swap – Try this sauce with thinly sliced beef.
- Shrimp Sweet and Sour – Substitute shrimp for a seafood version.
- Grilled Chicken Version – Use grilled chicken for a lighter option.
What to Serve with Sweet and Sour Chicken (15 Options)
- Steamed Jasmine Rice
- Fried Rice
- Chow Mein
- Stir-Fried Vegetables
- Egg Rolls
- Spring Rolls
- Hot and Sour Soup
- Wonton Soup
- Steamed Dumplings
- Asian Slaw
- Garlic Green Beans
- Sesame Noodles
- Roasted Broccoli
- Cucumber Salad
- Spicy Edamame
Storage and Reheating Tips
- Fridge: Store in an airtight container for up to 3 days.
- Freezer: Freeze in a sealed container for up to 3 months.
- Reheat: Use an oven at 375°F for best results—this keeps it crispy!
How Much Sweet and Sour Chicken Should I Make for Family Gatherings?
- 4-6 people: Stick to this recipe as written.
- 8-10 people: Double it.
- 15+ guests: Triple the batch.
How Far in Advance Can I Make Sweet and Sour Chicken?
- Chicken: Fry ahead and reheat in the oven.
- Sauce & Veggies: Prep and store separately until ready to serve.
This homemade Sweet and Sour Chicken is a game changer! Give it a try and let me know how it turns out!
Summarize and Save
Sweet and Sour Chicken Recipe – Crispy, Tangy, and Absolutely Irresistible
Ingredients
- 1 ½ pounds boneless, skinless chicken breasts, cut into 1-inch chunks
- ½ cup cornstarch
- ¼ cup all-purpose flour
- 2 eggs, beaten
- Canola oil (for frying)
- 1 red bell pepper, cut into 1-inch pieces
- 1 green bell pepper, cut into 1-inch pieces
- ½ yellow onion, cut into 1-inch pieces
- 1 cup pineapple chunks
- ½ cup granulated sugar
- ¼ cup brown sugar
- ½ cup apple cider vinegar
- ⅓ cup ketchup
- 4 teaspoon reduced-sodium soy sauce
- 2 clove garlic, minced
Instructions
- Start by mixing up that sauce. In a small bowl, whisk together the granulated sugar, brown sugar, apple cider vinegar, ketchup, soy sauce, and minced garlic. Set that aside—this sauce is about to bring everything together later.
- Pour enough canola oil into a deep frying pan or Dutch oven so it’s about 1 to 1 ½ inches deep. Heat it over medium-high heat until it reaches 350°F (175°C). This ensures the chicken gets that crispy, golden texture we’re after.
- Place the cornstarch into a large ziplock bag, add the chicken chunks, seal, and shake well until fully coated. Dip each piece into the beaten eggs, then coat it in flour, making sure each bite is evenly covered.
- Carefully add the coated chicken to the hot oil in small batches.Fry for 2-3 minutes per batch, or until golden brown and crispy.Transfer the chicken to a wire rack or baking sheet (skip the paper towels—this keeps it crispy).
- Drain off excess oil, leaving about a tablespoon behind. Toss in the red bell pepper, green bell pepper, onion, and pineapple chunks. Sauté for 1-2 minutes until they’re crisp-tender.
- Pour in the sweet and sour sauce and stir to coat the veggies and pineapple. Cook for 30 seconds to let the garlic infuse the sauce.Add the fried chicken back to the pan, tossing everything together until the sauce thickens and coats each bite.
- Serve immediately over rice or noodles. Garnish with sesame seeds or chopped green onions for that final touch.
Nutrition
Nutrition information is automatically calculated, so should only be used as an approximation.
Like This? Leave a comment below!