This post may contain affiliate links. Please read our disclosure policy.
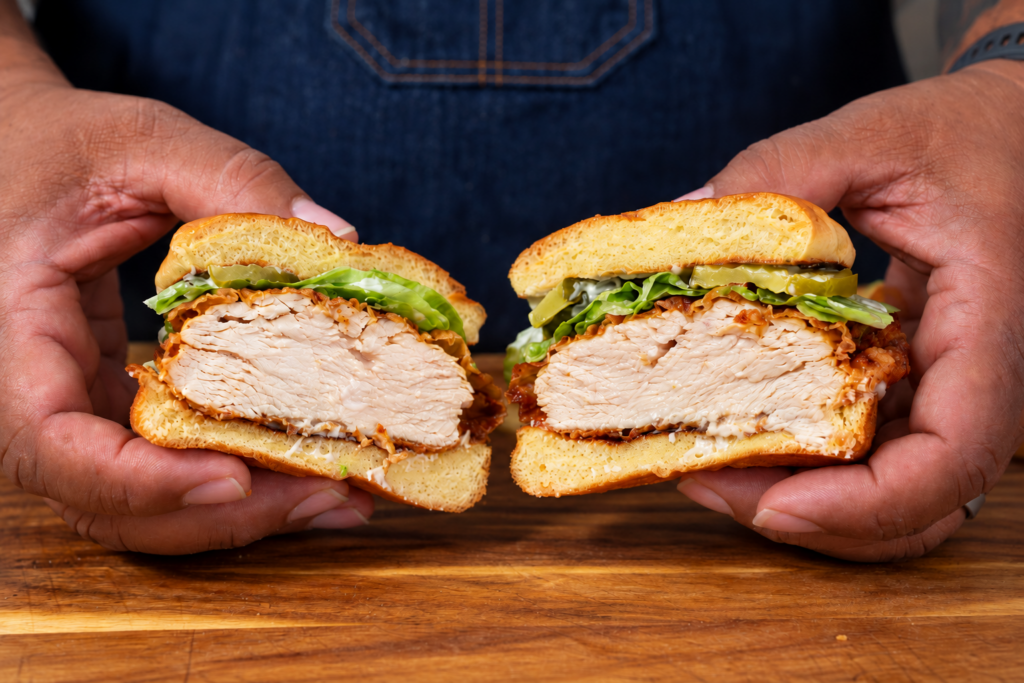
Table of Contents
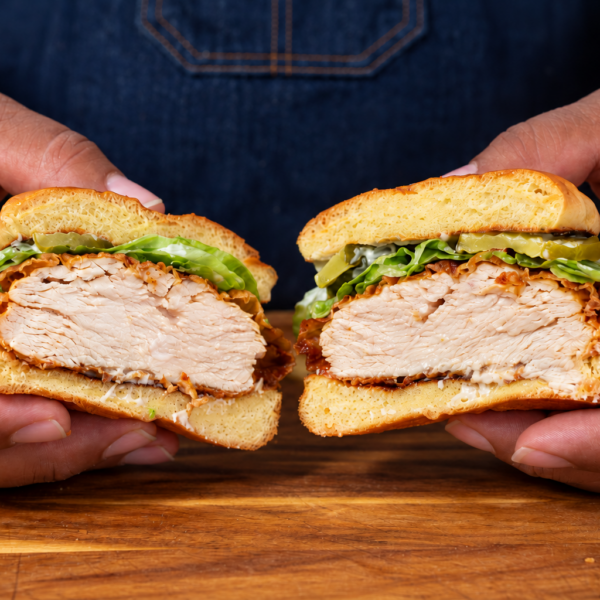
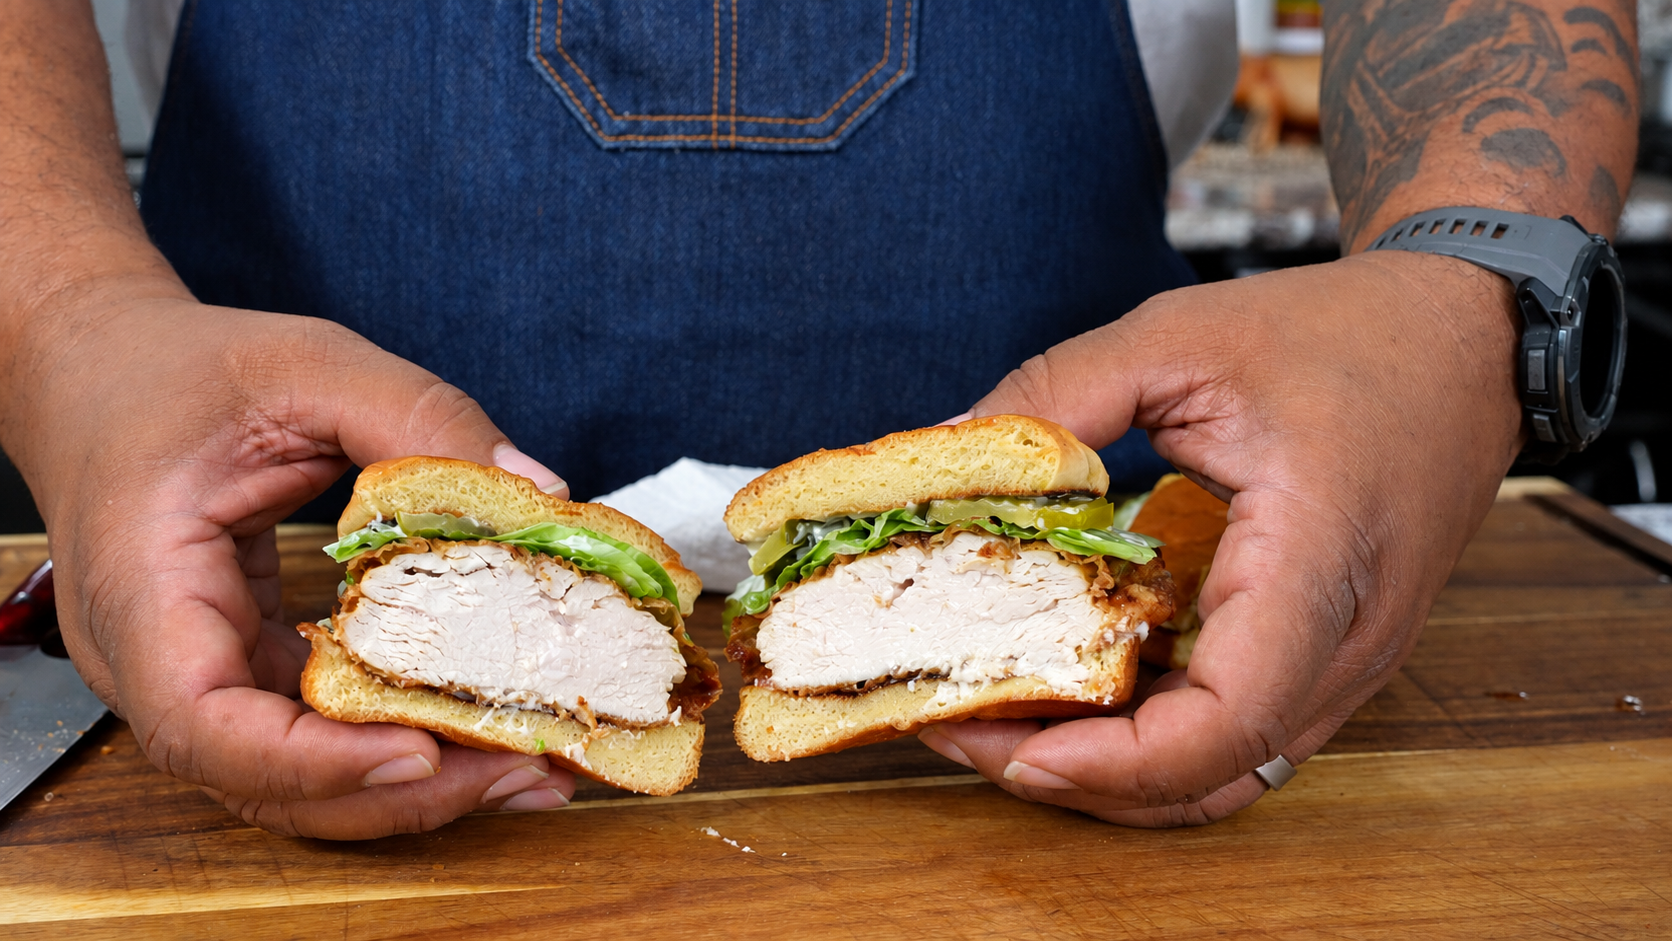
What’s up, family? We’re making a fried chicken sandwich with a golden, crunchy crust, juicy chicken, and just enough pickle flavor to keep you coming back for another bite. Put that on a toasted brioche bun with a little mayo, crisp lettuce, and dill pickles, and you’ve got a sandwich worth clearing some space on the dinner table for.
The flavor starts before that chicken ever hits the oil. A pickle juice brine seasons the chicken, while paprika, garlic, and onion powder bring flavor to the coating. You can keep the toppings simple or add a little heat, but give the brine time to do its work. That’s where this sandwich gets its start.
Why You’ll Love This Fried Chicken Sandwich
- Flavor beyond the crust. The pickle juice brine gives the chicken a savory, tangy finish.
- A crisp, seasoned coating. Pantry spices turn plain flour into a crust with plenty of flavor.
- Simple toppings. Brioche, mayo, lettuce, and pickles let the chicken shine.
- Room to make it your own. Add cayenne, switch up the sauce, or pile on some slaw.
Ingredients You’ll Need
The full measurements are in the recipe card below. Here’s what to keep in mind when you gather your ingredients.
Chicken breasts: Use four small boneless, skinless chicken breasts and pound them to about ½ inch thick. An even thickness helps the center cook through before the crust gets too dark. If your breasts are especially large, use two and slice them horizontally into four sandwich-sized cutlets.
Pickle juice: Use the liquid from a jar of dill pickles for that classic savory tang. Sweet pickle juice will give the sandwich a different flavor. Since salt levels vary between brands, avoid adding extra salt to the brine.
Seasoned flour: All-purpose flour, paprika, garlic powder, onion powder, salt, and black pepper make up the coating. Cayenne is optional if you want a little kick.
Eggs and milk: This mixture helps the flour stick to the chicken. Whole or 2% milk works here.
Brioche buns and toppings: Soft brioche gives you a little sweetness against the savory chicken. Mayo, dill pickles, and lettuce finish the sandwich; tomato is optional.
Vegetable oil: Choose a neutral oil suitable for frying, such as canola or vegetable oil.
How to Make a Pickle Brined Fried Chicken Sandwich
1. Prepare and Brine the Chicken
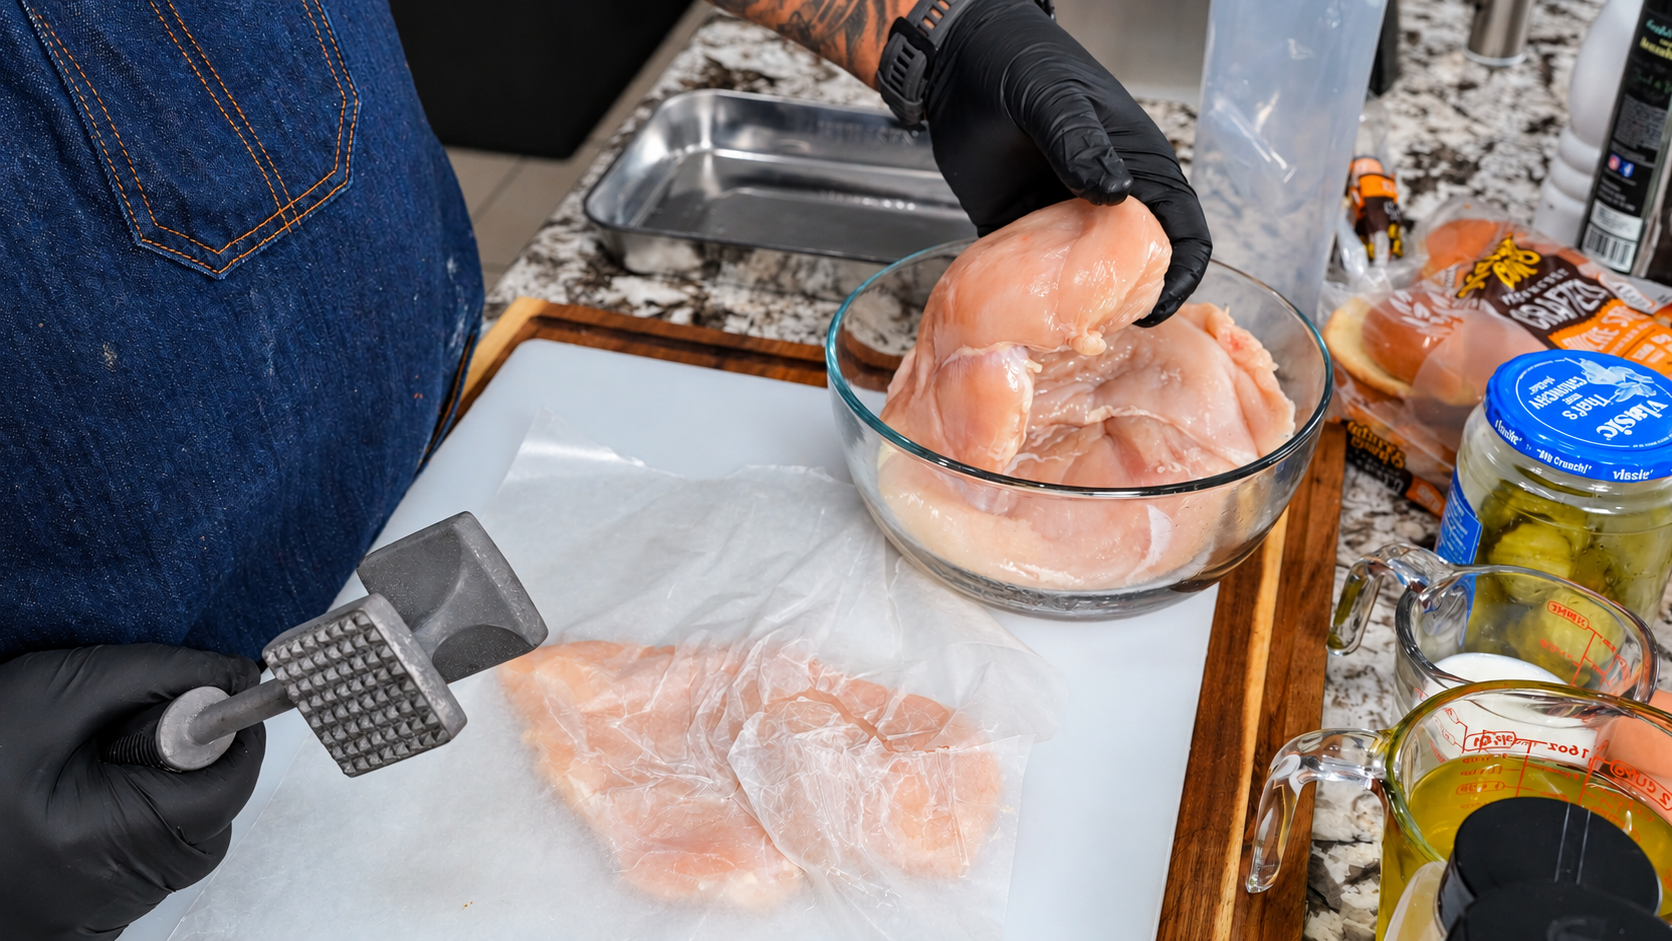
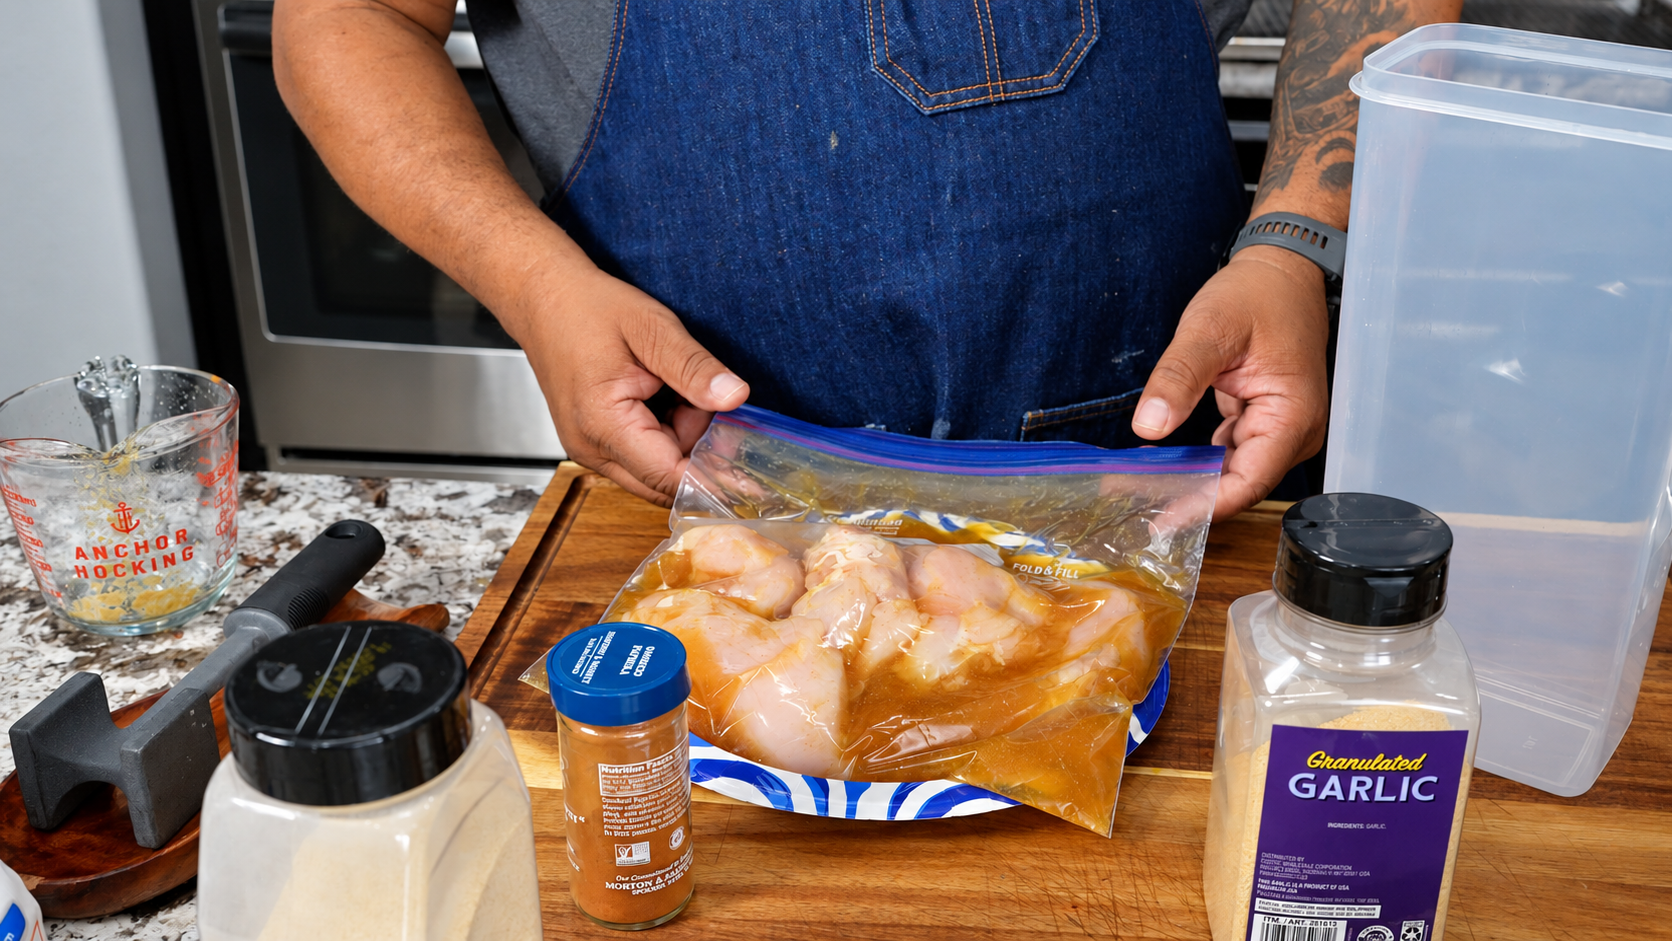
Pound the chicken to an even ½-inch thickness, then place it in a resealable bag or nonreactive container. Add the pickle juice, garlic powder, and paprika. Turn the chicken to coat, seal or cover, and refrigerate for 4 to 8 hours.
You can brine it overnight, up to about 12 hours, but longer isn’t always better. A very salty or acidic pickle juice can make the chicken overly salty or affect its texture. Keep the chicken refrigerated while it brines.
2. Set Up Your Coating Station
Remove the chicken from the brine, discard the used liquid, and pat the chicken dry with paper towels. There’s no need to rinse it.
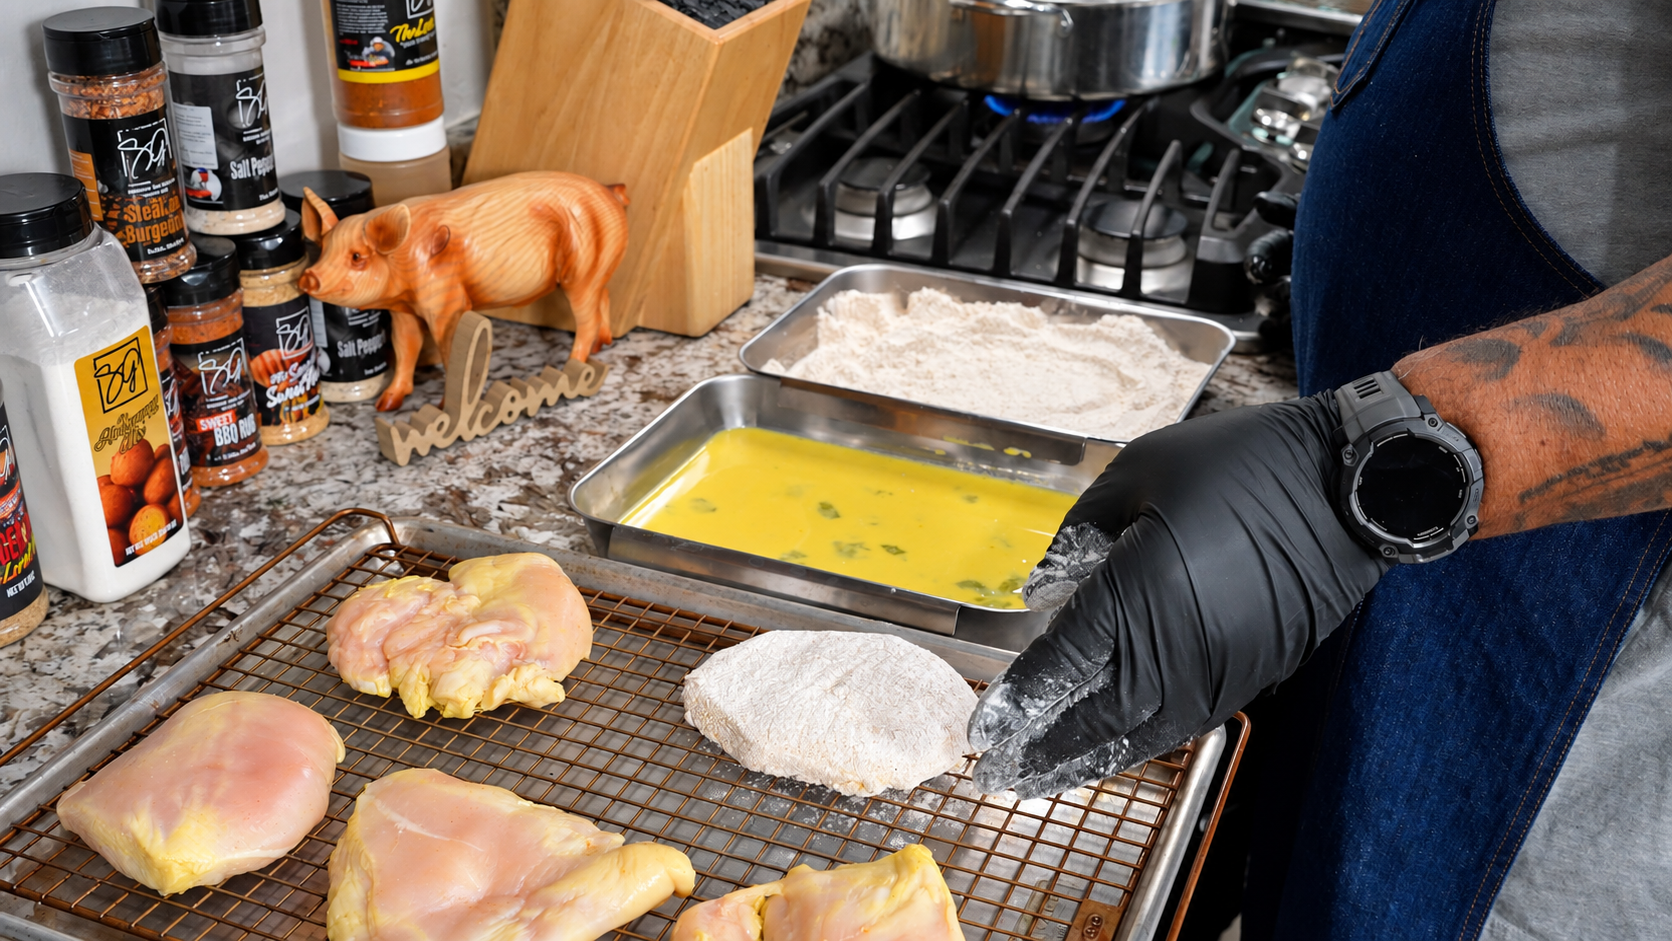
Combine the flour and coating seasonings in a shallow dish. In a second dish, whisk the eggs and milk until smooth. Set a wire rack over a baking sheet nearby so you have a place for the coated chicken.
3. Coat the Chicken
Dip each piece into the egg mixture, let the excess drip off, then press it into the seasoned flour. Get flour into every fold and along the edges. For a thicker crust, repeat the egg and flour coating once more.
Let the coated chicken rest on the rack for about 10 minutes while the oil heats. This gives the coating a chance to settle onto the chicken. Use a separate clean rack for the cooked pieces.
4. Fry Until Golden and Cooked Through
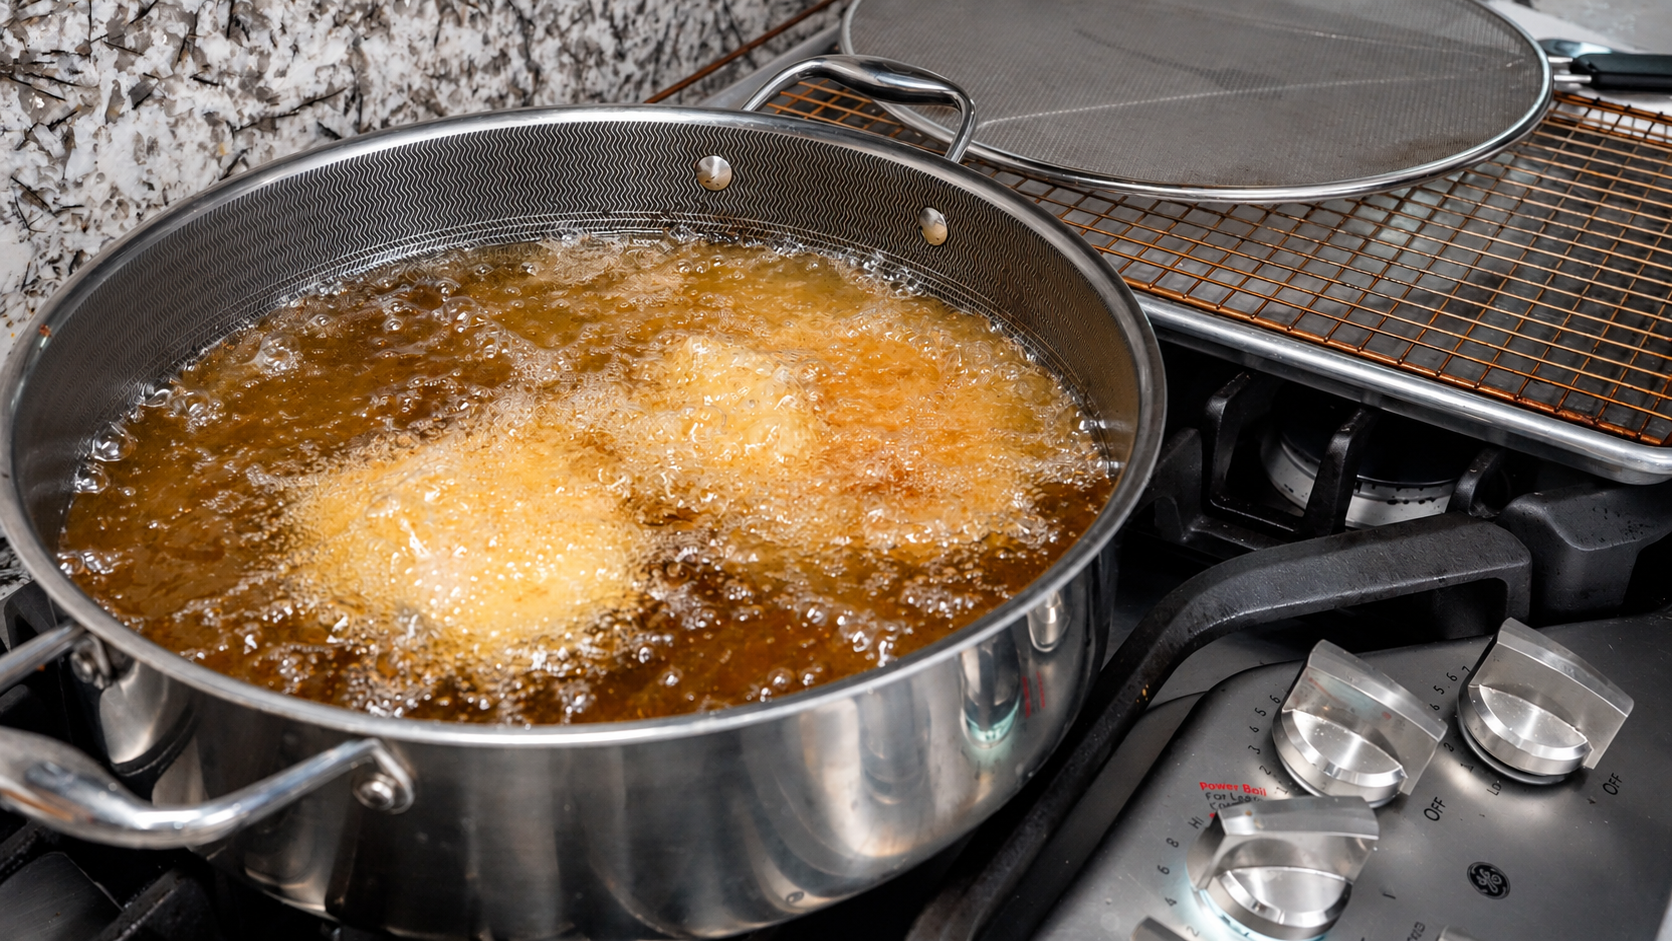
Add about 2 inches of oil to a heavy, deep pot or high-sided skillet, keeping the vessel no more than halfway full. Heat the oil to 350°F.
Carefully lower in one or two pieces of chicken at a time. Fry for approximately 4 to 6 minutes per side for ½-inch-thick pieces, adjusting the heat as needed. The oil temperature will drop when you add the chicken; let it return to 350°F between batches.
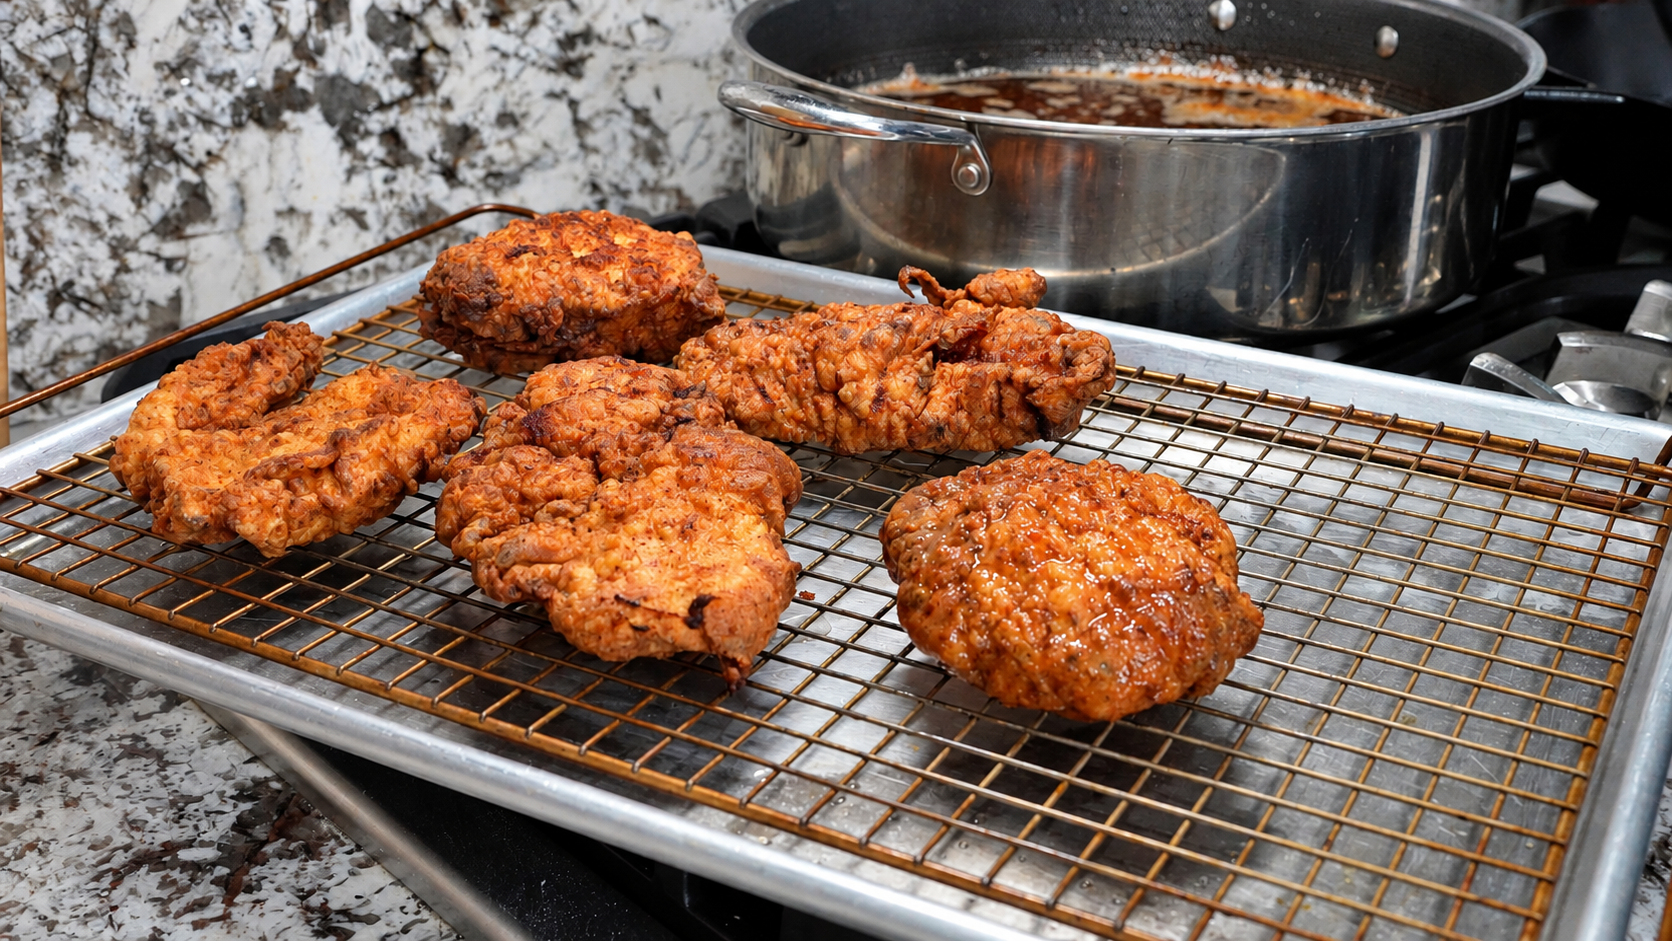
Use the time as a guide, not the final test. Check the thickest part of each piece with an instant-read thermometer, like the SnG Food Thermometer, and cook to 165°F. Move the chicken to a clean wire rack so air can circulate underneath and help keep the crust crisp.
5. Toast and Assemble
Toast the cut sides of the brioche buns in a dry skillet until lightly golden. Divide the mayonnaise among the buns, then layer on lettuce, fried chicken, two pickle slices per sandwich, and tomato if using. Add the top buns and serve while the chicken is hot and crisp.
AB’s Tips for a Crispy Chicken Sandwich
Start with even chicken. A thick center and thin edges won’t cook at the same speed. A few minutes of prep makes the frying easier.
Press the flour on. Don’t just give the chicken a quick dusting. Press the seasoned flour firmly onto the surface so you get a good coating.
Give the chicken space. Crowding the pot drops the oil temperature and makes it harder to get a crisp crust. Work in batches.
Reach for the thermometer. A golden crust doesn’t tell you whether the center is done. Check each piece before serving.
Build right before eating. Toasted buns help, but even a good crust softens if it sits under sauce and toppings too long.
Ways to Switch It Up
Make it spicy: Include the cayenne in the flour and stir a little hot sauce into the mayonnaise.
Add a sweet finish: Drizzle a little honey or hot honey over the cooked chicken just before assembling.
Bring in some slaw: Replace the lettuce with a small scoop of well-drained coleslaw for extra crunch.
Use chicken thighs: Boneless, skinless thighs work too. Flatten them to an even thickness and check each piece for an internal temperature of 165°F; cooking time may change.
What to Serve With It
French fries and my Southern Coleslaw make this an easy sandwich plate. My Louisiana-Style Potato Salad or Southern Baked Mac and Cheese will round out the meal, too. If you’re serving a crowd, have your sides ready before you start frying so the chicken can go straight from the rack to the buns.
For that takeout-style plate at home, serve these sandwiches with my KFC Copycat Crispy Potato Wedges or Homemade Onion Rings. Put a bowl of my Onion Ring Sauce on the table for dipping.
Pour a cold glass of Homemade Strawberry Lemonade or Classic Southern Iced Tea to go with your sandwich.
And if you want something sweet to finish the meal, my Southern Banana Pudding belongs on that table. Make it ahead so you can focus on frying when it’s time to eat.
Want another side for the plate? Grab AB’s Hushpuppy Mix from my shop and serve a batch alongside these sandwiches.
If fried chicken sandwiches are your thing, give my Southern-Style Buttermilk Fried Chicken Sandwich a try next.
Storage and Reheating
Store leftover chicken separately from the buns and toppings. Refrigerate it in a covered container within 2 hours of cooking and use within 3 to 4 days.
To reheat, place the chicken on a rack over a baking sheet in a 375°F oven until hot throughout, starting to check around 10 to 15 minutes. Reheat to an internal temperature of 165°F. Toast fresh buns and assemble just before serving. The microwave will warm the chicken, but it will soften the coating.
Frequently Asked Questions
Does the chicken taste strongly like pickles?
Expect a savory tang rather than the same flavor as biting into a pickle. The strength depends on the pickle juice and how long the chicken sits in it. Stick with the shorter end of the brining window for a milder result.
Can I prepare anything ahead of time?
Yes. Brine the chicken in the refrigerator and mix the dry coating ingredients ahead of time. Wait to coat and fry the chicken until you’re getting ready to serve for the best texture.
Do I have to double coat the chicken?
No. One coating gives you a lighter crust. Repeating the egg and flour steps builds a thicker coating. Either way, press the flour onto the chicken and let it rest briefly before frying.
Can I reuse the pickle juice after brining?
No. Once the pickle juice has been in contact with raw chicken, discard it. Use fresh pickle juice if you want to add some to a sauce.
Why is my coating falling off?
Excess moisture, loose flour, and handling the chicken too much during frying can all contribute. Pat the chicken dry, press the flour on, let the coating rest, and turn the chicken gently once the crust has set.
Summarize and Save
Pickle Brined Fried Chicken Sandwich
Ingredients
For the chicken and brine
- 4 small boneless skinless chicken breasts, pounded to about ½ inch thick
- 2 cups dill pickle juice
- 1 teaspoon garlic powder
- 1 teaspoon paprika
For the coating
- 2 cups all-purpose flour
- 1 tablespoon paprika
- 1 teaspoon garlic powder
- 1 teaspoon onion powder
- 1 teaspoon salt
- ½ teaspoon black pepper
- ½ teaspoon cayenne pepper optional
For the wet mixture
- 2 large eggs
- ½ cup milk
For frying
- Vegetable oil enough for about 2 inches in a deep pot, without filling it more than halfway
For serving
- 4 brioche buns split
- 8 dill pickle slices
- 4 lettuce leaves
- 4 tomato slices optional
- 2 tablespoons mayonnaise
Instructions
- Brine: Place the evenly flattened chicken in a resealable bag or nonreactive container. Add the pickle juice, garlic powder, and paprika. Seal or cover and refrigerate for 4 to 8 hours, or overnight up to about 12 hours.
- Dry: Remove the chicken and pat dry with paper towels. Discard the used brine.
- Mix the coating: Combine the flour, paprika, garlic powder, onion powder, salt, black pepper, and optional cayenne in a shallow dish.
- Mix the wet ingredients: Whisk the eggs and milk in a separate shallow dish.
- Coat: Dip each piece of chicken into the egg mixture, let the excess drip off, then press into the seasoned flour. Repeat once for a thicker crust, if desired. Rest on a rack for 10 minutes while heating the oil.
- Heat the oil: Add about 2 inches of oil to a heavy, deep pot or high-sided skillet, keeping it no more than halfway full. Heat to 350°F.
- Fry: Cook in batches, approximately 4 to 6 minutes per side for ½-inch-thick chicken, until golden and the thickest part reaches 165°F. Adjust the heat as needed and let the oil return to 350°F between batches.
- Drain: Transfer the cooked chicken to a separate clean wire rack and rest briefly while toasting the buns.
- Toast: Toast the cut sides of the buns in a dry skillet until lightly golden.
- Assemble: Divide the mayonnaise among the buns. Add lettuce, chicken, two pickle slices per sandwich, and optional tomato. Close the sandwiches and serve immediately.
Notes
- For very large chicken breasts, use two breasts sliced horizontally into four cutlets instead of four whole breasts.
- Brine strength varies. Use 4 hours for especially salty or acidic pickle juice and avoid adding salt to the brine.
- Cooking time depends on thickness, batch size, and oil temperature. Always check the chicken with a thermometer.
- Extra flour mixture and egg wash that have touched raw chicken should be discarded.
Nutrition will vary with chicken size, bun brand, coating retained, and oil absorbed.
Nutrition
Nutrition information is automatically calculated, so should only be used as an approximation.

Like This? Leave a comment below!
Family, keep those buns toasted, give that chicken a good crunch, and build these sandwiches while everything is fresh. Let me know how you’re serving yours—classic with pickles and mayo, or with a little extra heat.